


- 0
Reader Level:
Introduction
Entity Framework is the next level of database programing which is much more flexible and adaptable than earlier methods like Regular ADO.Net and LINQ to SQL.
Prerequisites
- Install Visual Studio 2008 or Visual Studio 2010
- Install MySQL database on your local machine
- MySQL database admin tool that allows you to create a database and run SQL statements. I am using phpMyAdmin which is a web interface.
- Download and install MySQL Connector.
Getting Started
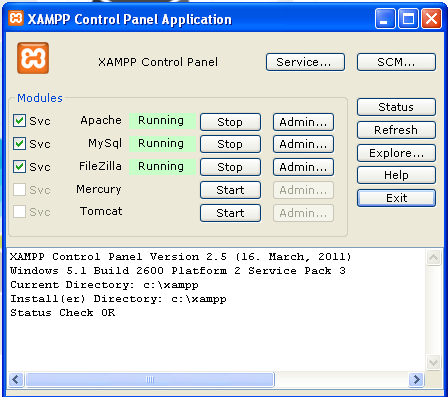
Run the XAMPP application and it will automatically install the Apache server, MySQL database, and FileZilla. After installing check whether these services are running or not. The following XAMPP control panel shows which of those services are currently running.
Run the XAMPP application and it will automatically install the Apache server, MySQL database, and FileZilla. After installing check whether these services are running or not. The following XAMPP control panel shows which of those services are currently running.
Now the following steps will show how to connect to a MySQL database using C#.
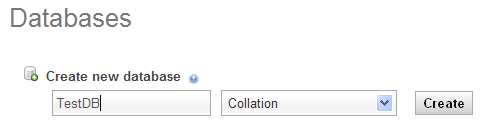
Step 1 : Open MySQL Admin page and create a new database.
Step 2 : After creating the new database, create a new table.
CREATE TABLE `employee` (
`EmpId` bigint (20) NOT NULL,
`EmpName` varchar (200) default NULL,
`EmpAddress` varchar (255) default NULL,
PRIMARY KEY (`EmpId `)
) ENGINE=InnoDB DEFAULT CHARSET=latin1;
`EmpId` bigint (20) NOT NULL,
`EmpName` varchar (200) default NULL,
`EmpAddress` varchar (255) default NULL,
PRIMARY KEY (`EmpId `)
) ENGINE=InnoDB DEFAULT CHARSET=latin1;
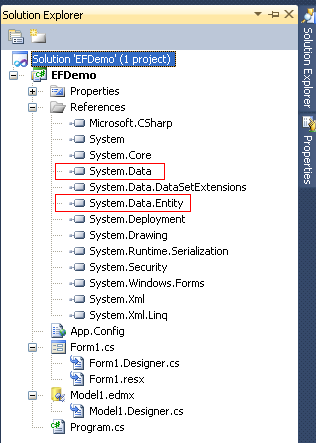
Step 3 : After creating the new table, open Visual Studio and click on New Project and name the project. It will open the new project, then click on Solution Explorer (F4), right-click on "Reference" to add a new reference into the project. Reference those two .dll files to the project (MySql.dll (Win apps), MySql.Data.Entity.dll).
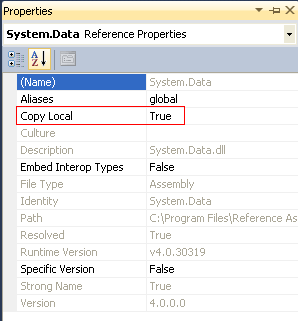
Step 4 : In Solution Explorer go to the "System.Data" properties and set the "Copy Local" property to true.
The Copy Local property (corresponding to CopyLocal) determines whether a reference is copied to the local bin path. At run time, a reference must exist in either the Global Assembly Cache (GAC) or the output path of the project. If this property is set to true, the reference is copied to the output path of the project at run time.
The Copy Local property (corresponding to CopyLocal) determines whether a reference is copied to the local bin path. At run time, a reference must exist in either the Global Assembly Cache (GAC) or the output path of the project. If this property is set to true, the reference is copied to the output path of the project at run time.
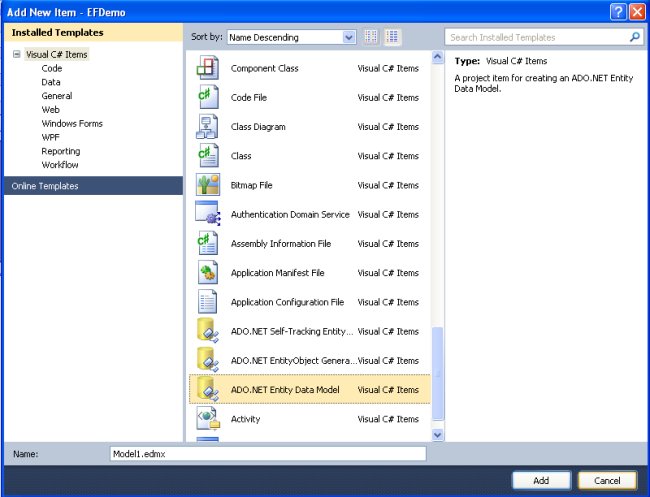
Step 5 : Add new Entity Data Model into the project.
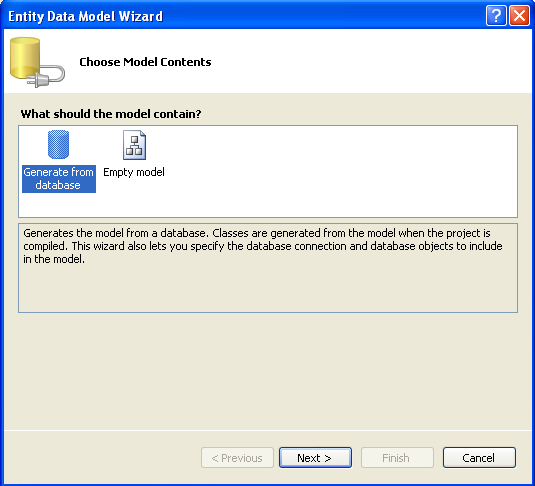
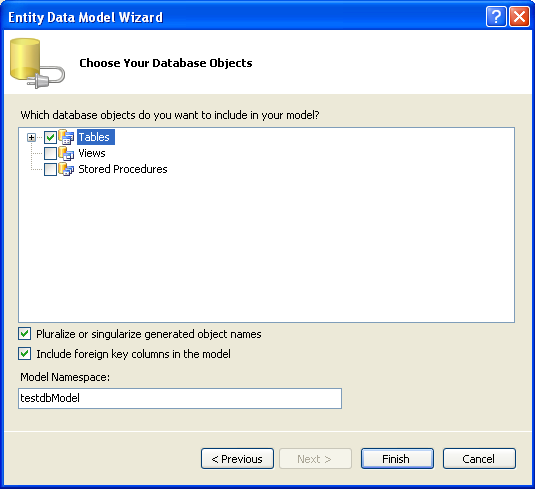
Step 6 : Select "Generate from database" in Entity Data Model Wizard.
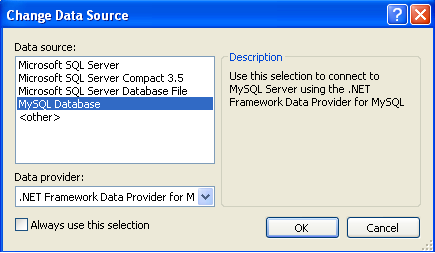
Step 7 : Select MySQL Database.
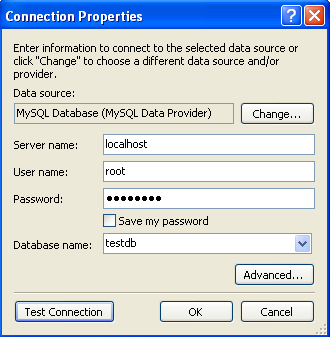
Step 8 : Set Connection properties for MySQL.
Step 9 : This step will display all the tables, views and stored procedures.
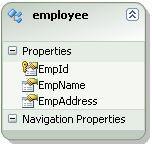
Step 10 : By double-clicking on Model1.edmx, it will open the EDM designer which displays all the entities for selected tables.
Step 11 : The following code will insert the data into the MySQL table.
private void btnInsert_Click(object sender, EventArgs e)
{
testdbEntities testcontext = new testdbEntities();
try
{
employee emp = new employee
{
EmpId = int.Parse(txtId.Text),
EmpName = txtName.Text,
EmpAddress = txtAddress.Text
};
testcontext.employee.AddObject(emp);
testcontext.SaveChanges();
MessageBox.Show("Record Inserted successfully.", "Insert", MessageBoxButtons.OK,MessageBoxIcon.Information);
LoadToGrid();
}
catch (Exception ex)
{
MessageBox.Show(ex.InnerException.ToString());
}
}
Step 12 : The following code will update the data in the MySQL table.
private void btnUpdate_Click(object sender, EventArgs e)
{
int EmpId;
string s = txtId.Text;
int.TryParse(s, out EmpId);
testdbEntities testcontext = new testdbEntities();
try
{
employee emp = testcontext.employee.First(i => i.EmpId == EmpId);
{
emp.EmpName = txtName.Text;
emp.EmpAddress = txtAddress.Text;
testcontext.SaveChanges();
MessageBox.Show("Record Updated successfully.", "Update", MessageBoxButtons.OK,MessageBoxIcon.Information);
LoadToGrid();
};
}
catch (Exception ex)
{
MessageBox.Show(ex.InnerException.ToString());
}
}
Step 13 : The following code will delete the data into MySQL table.
private void btnDelete_Click(object sender, EventArgs e)
{
int EmpId;
string s = txtId.Text;
int.TryParse(s, out EmpId);
testdbEntities testcontext = new testdbEntities();
try
{
employee emp = testcontext.employee.First(i => i.EmpId == EmpId);
testcontext.employee.DeleteObject(emp);
testcontext.SaveChanges();
MessageBox.Show("Record Deleted successfully.", "Delete", MessageBoxButtons.OK,MessageBoxIcon.Information);
LoadToGrid();
}
catch (Exception ex)
{
MessageBox.Show(ex.InnerException.ToString());
}
}
Step 14 : The following function will load the data from the table and bind it to a GridView.
private void LoadToGrid()
{
testdbEntities testcontext = new testdbEntities();
var load = from g in testcontext.employee select g;
if (load != null)
{
dataGridView1.DataSource = load.ToList();
}
}
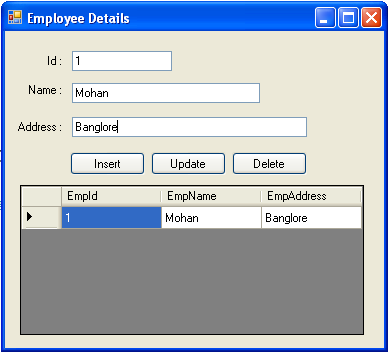
Step 15 : Final Result
没有评论:
发表评论